Fig Frozen Yogurt

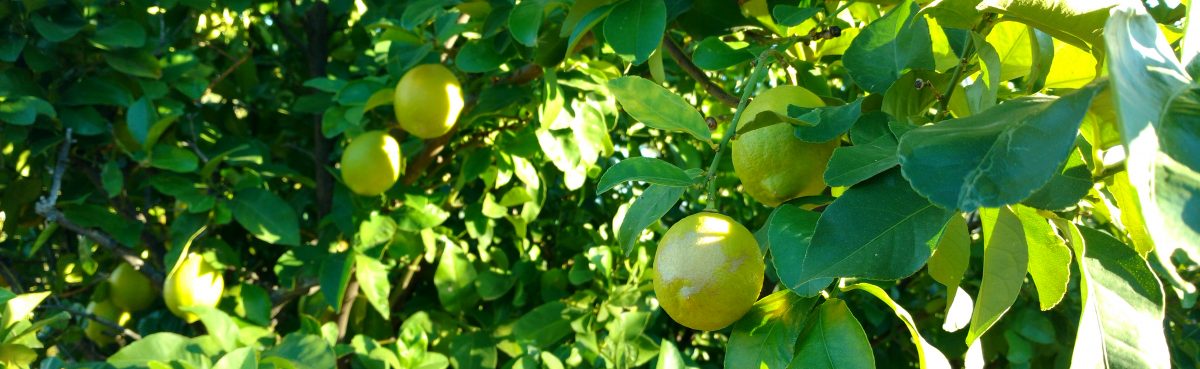
We interrupt the planned posting about citrus, part two, to bring you a post about a currently fresher fruit known as…

FIGS.

Seasonal foods were the rule on the farm; if you wanted to eat, they were what showed up on your plate. Out of season it had better be cellared, canned or frozen, because the selection at the grocery was slim by today’s standards. I have to admit that my mother, the adventurous cook, did go a bit hog wild when a selection of more international ingredients began showing up in the produce bin, but for the most part we happily ate what we produced or found locally.

I continue to prioritize purchase of foods produced locally. However, a few years ago a small carton of tiny, pear shaped purple fruit beckoned to me at the store. “Hey, come ‘ere,” it whispered. “Remember those highly seductive recipes in which I am the star ingredient? You know you want to take me home…” Gosh darn it, that fruit was totally persuasive and ultimately won the argument. Thus was born my relationship with fresh figs.

I doubt that either of my parents ever tried a fresh fig. Given that figs grow in Mediterranean climates we certainly didn’t grow them on the farm, and they seldom made an appearance at our local grocery, if ever. In our world, figs were these dark, gooey, sticky, seedy things that somehow inexplicably lived between two layers of thin cookie pastry, found occasionally in the school lunchbox.

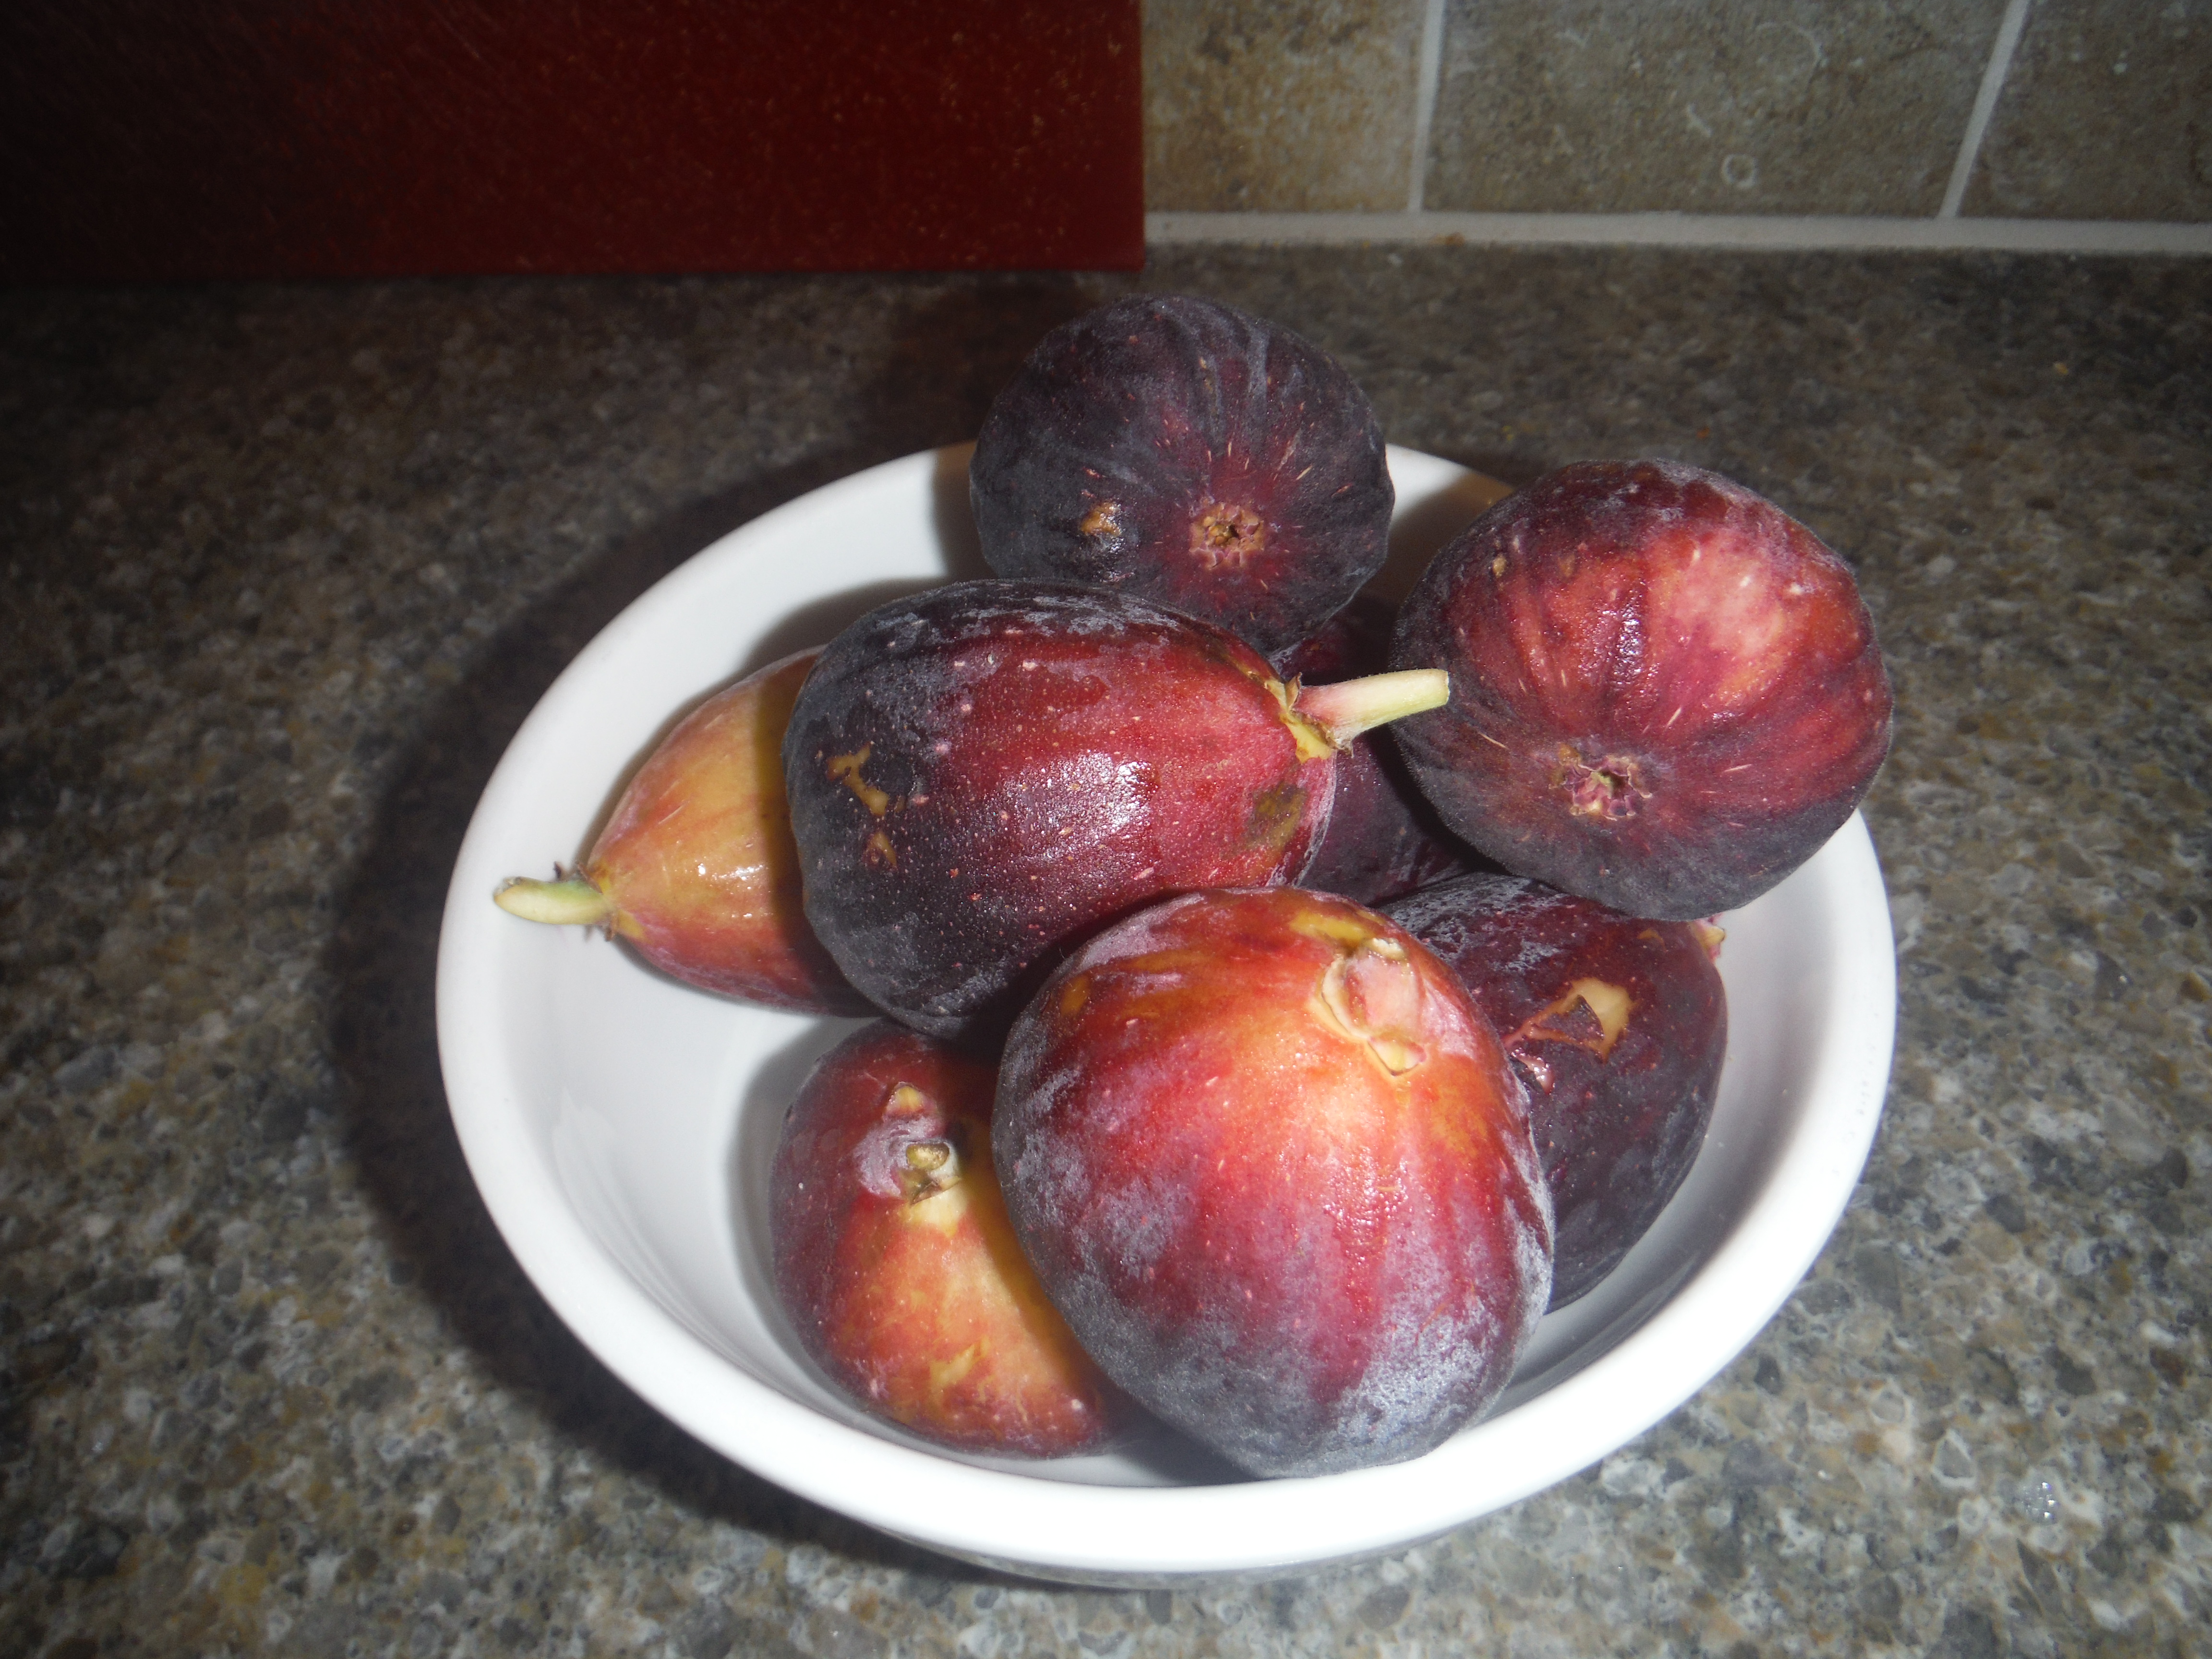
I simply refuse to believe that fresh figs are in any way related to those dried figs I knew from my childhood. Fresh figs are juicy and lush, with a sumptuous texture and flavor that somehow combines berries, honey and port. If you have never tried one, put that experience on your bucket list because you are missing out. Alas, once tried I wanted figs all the time, but most weeks those fickle fruits were nowhere to be found. Just like a fruit to draw me in then just… disappear from the bin.

So when contemplating a move to the desert southwest, the obvious priorities were things like climate, housing, transition to a new community, etc., etc. But if I’m honest, there was a tiny niggling thought deep in my mind that figs are local seasonal fruit in southern Arizona. Perhaps I could have a FIG TREE growing inconspicuously somewhere…Fast-forwarding to now, I am happy to report that really fresh organic figs are for sale every week in season at the farmer’s market. Even better, we met a neighbor with a fig tree that produces more than he could possibly use. Could we help him out? Yeah, we could probably do that.

We typically eat figs out of hand as fresh unprocessed fruit. I serve them for dessert with a scoop of ricotta or Greek yogurt, a drizzle of honey and a few chopped pistachios-YUM. It’s just possible that I might have wrapped them in bacon and baked ‘til  crisp one time, but that certainly sounds unhealthy doesn’t it? We won’t go any further into detail about that!

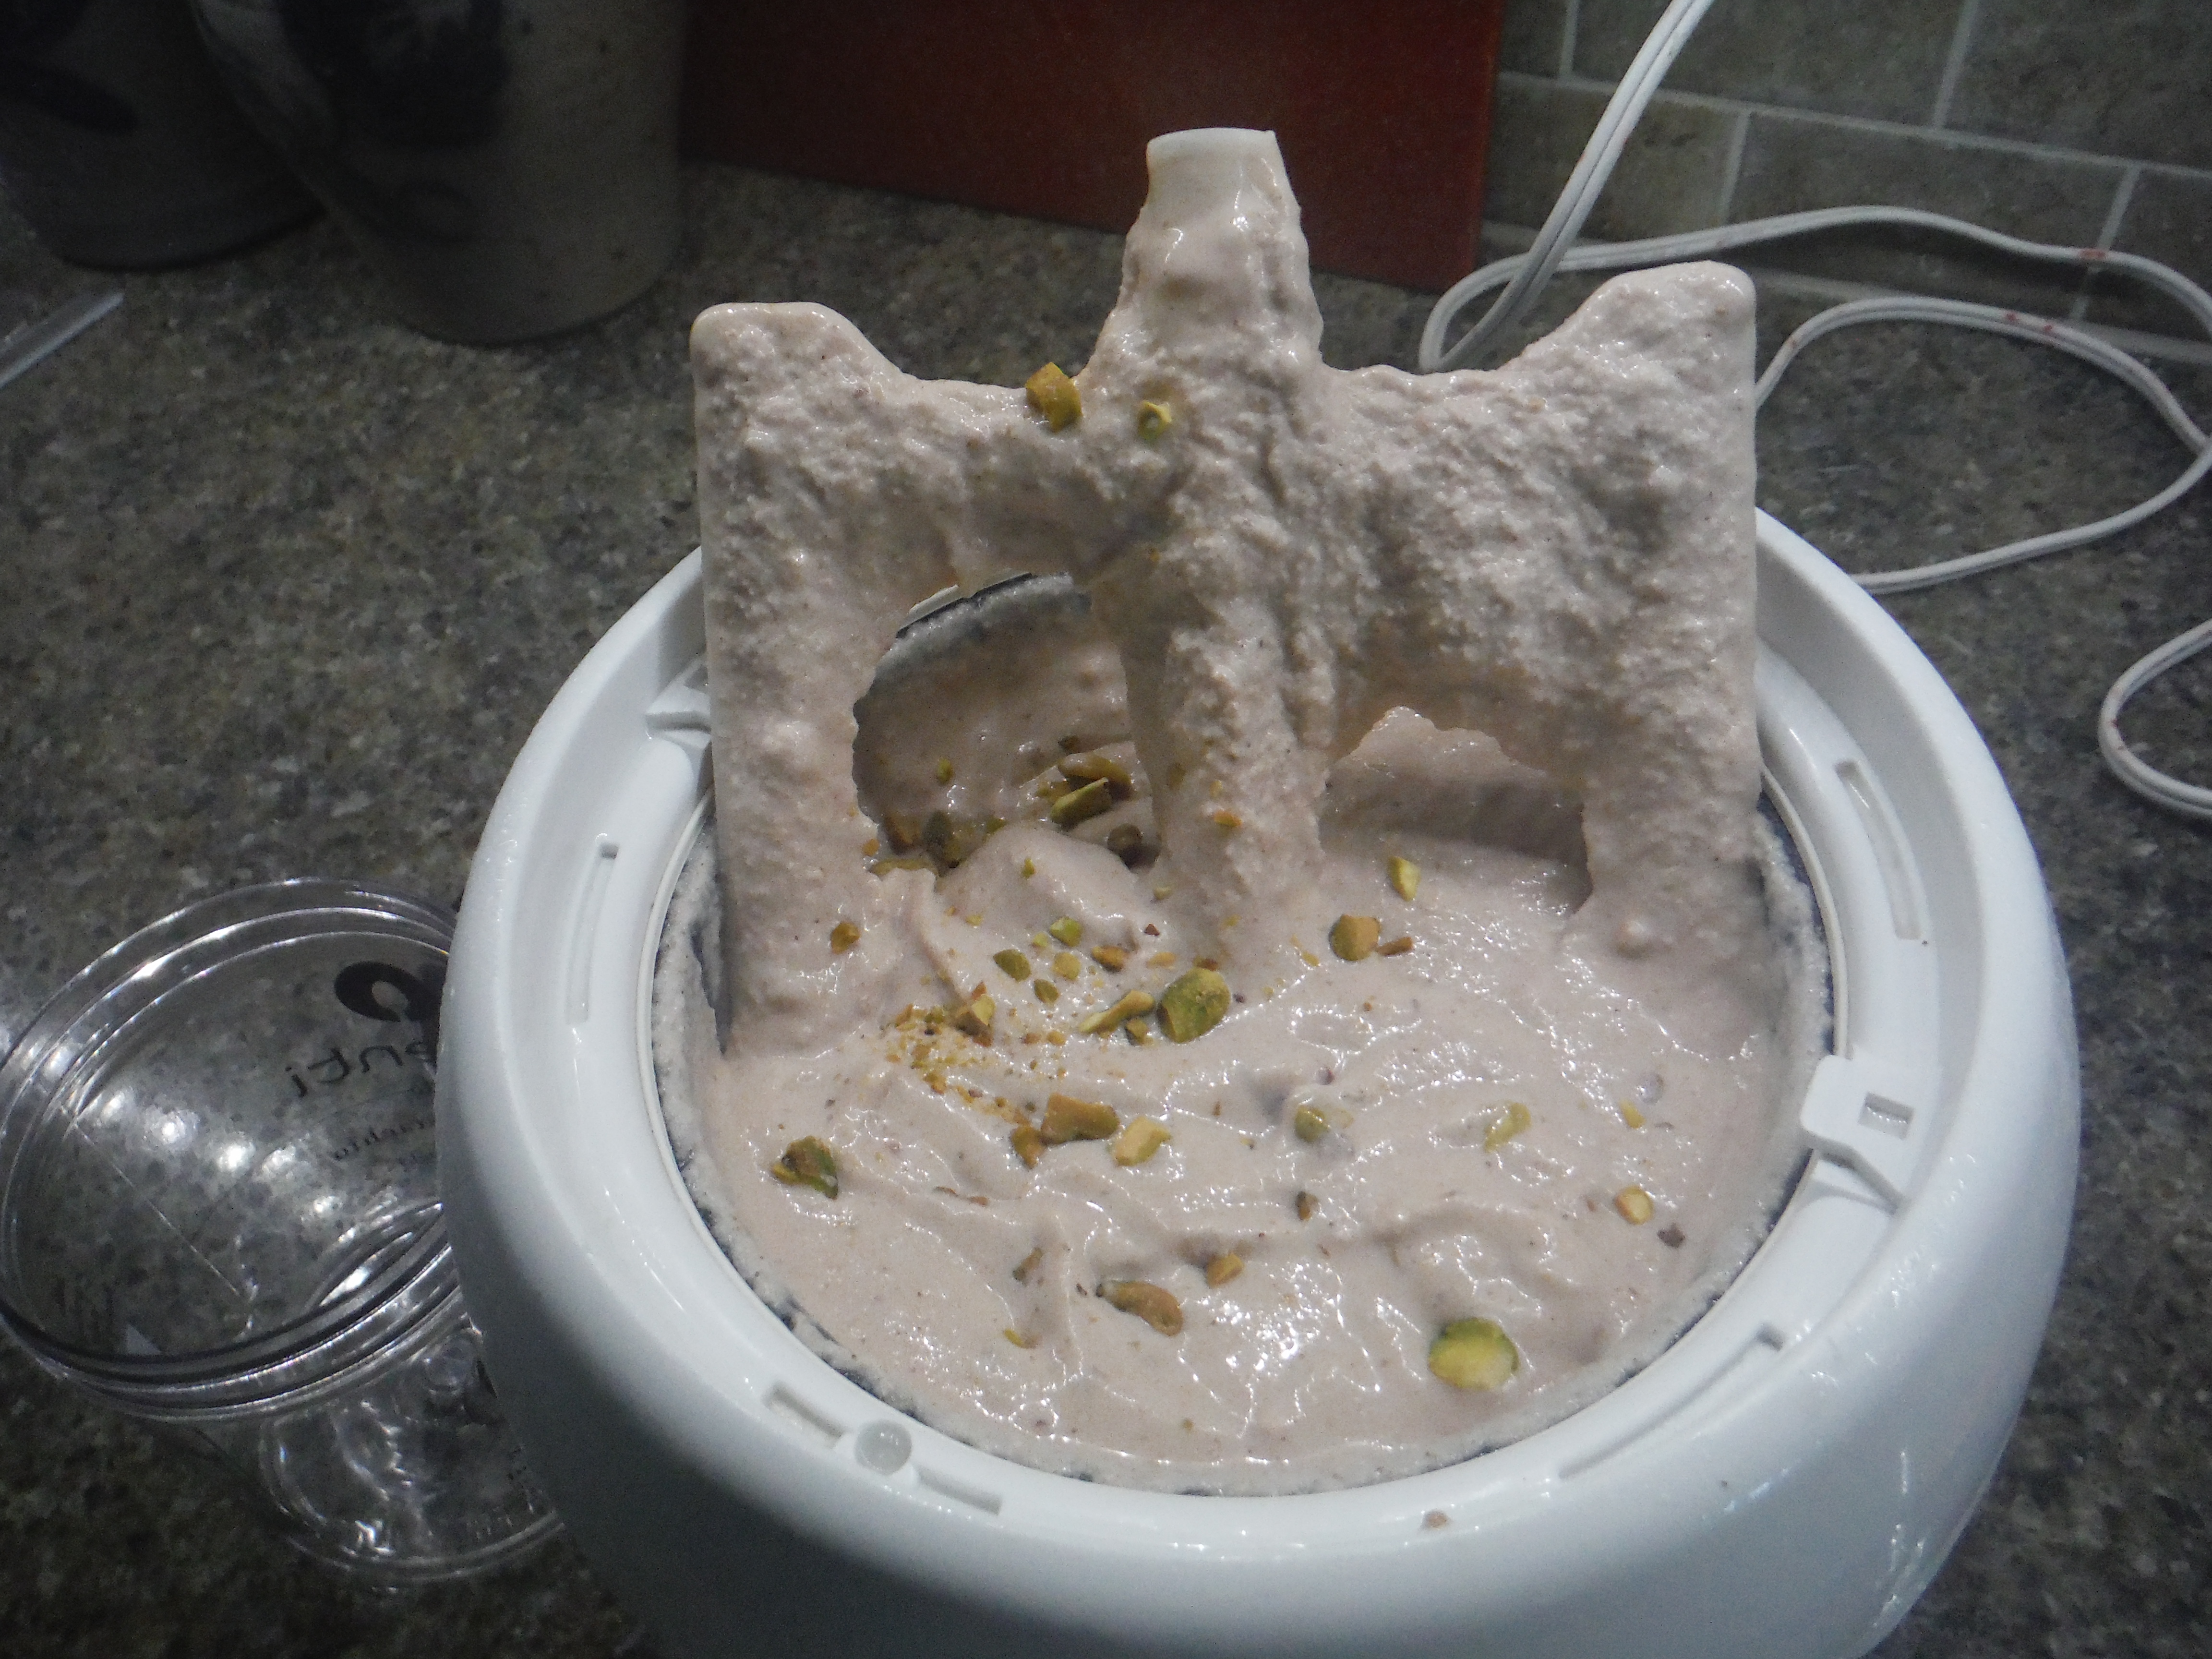
But here we are in high fig season and we have them coming out our ears. I am not going to turn these figs into their evil alias by drying them, so finally decide to turn them into creamy frozen yogurt. This fro-yo makes that elusive flavor combination available whenever I want by simply walking to the freezer. My mom would like that, along with the ease of my tabletop ice cream freezer!

Now in case the fickle fig is not to be found in your locale, other fruits make delicious frozen yogurt, too. Strawberries could easily stand in for the figs with no changes to the recipe. Peaches would be delicious as well; omit the cinnamon and balsamic vinegar, and add a few drops of almond extract. Whatever the fruit you choose, this frozen yogurt should definitely be part of your summer eating.


Big Fig Flavor

Prep Time20 minutes
Total Time20 minutes
Course: Dessert
Servings: 3 pints

Ingredients

  • 8 large figs stemmed
  • ½ cup sugar
  • 2 cups plain full-fat Greek yogurt
  • 2 cups plain full-fat yogurt
  • ¼ cup honey
  • ½ teaspoon cinnamon
  • 2 teaspoons vanilla
  • 2 teaspoons good quality balsamic vinegar
  • 1 teaspoon lemon juice
  • ½ cup chopped toasted pistachio nuts

Instructions

  • Cut the figs into quarters and place in the work bowl of food processor. Pulse to puree. Add the remaining ingredients except the pistachios, and process to blend thoroughly. Freeze in a tabletop ice cream maker by following the directions specific to your freezer. Once frozen, fold in the chopped pistachios and spoon into containers. Cover and place in the refrigerator freezer compartment until solidly frozen, several hours.


Farro Salad with Moroccan Spices

Farro Salad with Moroccan Spices

Moving to the desert southwest, we expected a few Saguaro, prickly pear, and Palo Verde trees. A few agave, teddy bear cacti-the typical palate of Sonoran flora and fauna. We did in fact have all those plants on our property. What we did not expect was a full grove of seven mature citrus trees. Other than watering and fertilizing, we somehow ignored the rapidly growing golden globes until last November. Then the harvest started, we were drowning in tangerines, and the old farm ethos kicked in…

Everything we grew on the farm was either eaten or preserved. While weeding, picking and preparing vegetables for the table was often my responsibility, the preserving of the harvest was a daily job throughout the summer for my mother and me. Most of the produce had to be cleaned, shucked, blanched and shocked before freezing in stackable boxes. Tomatoes and their juice had to be steam peeled, cooked and strained before pouring into freshly sterilized jars and going into the canner.

These steamy activities took place in a big old non-air conditioned kitchen, accompanied by average heat in the upper eighties with humidity to match. While others might attribute their lovely skin to avoiding the sun and not smoking, I know better. My skin has remained relatively smooth well into my…well, let’s call it “advanced middle age,” because I lived in a steam bath all summer for the first two decades of my life.

So now my husband is proudly carting basket upon basket of citrus fruit into our new kitchen, just as my dad did with vegetables years ago on the farm. I was dubious about the pride, for this fruit had basically grown itself, but the piles of citrus remained all the same. He was also expecting with great anticipation that I would know what to do with all of it. Uh, yeah. Our friends quickly realized that while an invitation to dinner at our house might mean a delicious meal, the exit ticket would be grabbing a bag of citrus fruit on their way out the door…

Eventually we had to face the preservation of all this fruit. We zested and juiced abundant amounts, which we froze for later use. I tested recipes and made jars of freezer citrus curd. The husband continues the quest for the perfect limoncello. And then there were the preserved lemons… The harvest ended around April, so now we are enjoying the fruits of our labor, so to speak.

Preserved lemons are a unique product, perhaps new to many Westerners. They are typically used in Middle Eastern dishes such as tagines. Classically combined in long braises with meat, chickpeas and olives, they lend a deep lemony umami that is both unfamiliar and delicious. Their production is basically a fermentation process using salt, lemons and seasonings. While I would not have made them myself had I not been wrestling with bushels of lemons, you are welcome to have at it should you be so inclined. (Let it be noted that I have purchased them in the past at Trader Joes…)

The process I used can be found at: https://cooking.nytimes.com/recipes/1016212-preserved-lemons

Now deep umami braises are just peachy in the desert in January. In July?At 108° F.? Not so much. Which is how a lunchtime salad was born this week. Whole grains, vegetables, and maximum flavor with none of the hot steaminess, thank the heavens above.

Farro Salad with Moroccan Spices

Prep Time30 minutes
Cook Time30 minutes
Total Time1 hour
Course: Salad
Servings: 4 servings

Ingredients

  • ¾ cup farro
  • 2-¼ water or broth
  • ½ teaspoon salt
  • 2 tablespoons diced preserved lemon peel
  • 6 grape tomatoes
  • ¼ cup chopped green olives
  • ¼ cup sliced celery
  • ½ cup sliced green onion
  • ½ cup chopped parsley
  • 2 cups cubed cooked chicken or drained chickpeas for a vegetarian version
  • Dressing:
  • 3 tablespoons olive oil I use garlic infused oil for one of the three
  • 1 tablespoon lemon juice
  • ¼ teaspoon each of:
  • Cumin
  • Coriander
  • Cayenne
  • Leaf thyme
  • Grated lemon zest
  • ½ teaspoon smoked paprika
  • Salt and pepper to taste

Instructions

  • Rinse the farro grains, then add to the water or broth in a saucepan along with the salt. Bring to a boil, reduce to simmer and cook for approximately 30 minutes, or until tender but still chewy. Drain and turn into a large mixing bowl. Cool slightly. Add the remaining salad ingredients and combine gently.
  • Whisk the dressing ingredients together and pour over the salad. Stir gently to coat with dressing. Cover and chill until ready to serve.


To make gluten-free: substitute brown or forbidden black rice for the farro.

Mom’s Buckwheat Cakes


Buckwheat 'Cakes
Buckwheat ‘Cakes

Hotcake, flapjack, griddlecake, battercake…

The light, fluffy, even puffy all-American pancake has been a coveted breakfast dish for decades, both in homes and especially in restaurants. Tall stacks featured on menus and on boxes, dripping with butter and syrup… irresistible!

Sadly, for my childhood self, such pancakes were not exactly health food. Each cake is basically a piece of white bread, enriched with additional sugar, eggs and fat. It should come as no surprise that these would not be on our breakfast table on the farm. While my grandmother was usually my processed food savior, pancakes weren’t even served on her table. Turns out this wasn’t really much of a problem, though.

Because my mother made incredibly delicious dishes that she called pancakes. Most often these were actually crepes, rich in eggs and milk with just a smidge of flour, fried up in ultra-thin cakes with crisp, lacy edges. She spread them lightly with butter, poured the briefest of syrup drizzles, and then rolled them up into cylinders on the plate. There were no complaints, no fluffy pancake envy.

Every now and again though, she would make her yeast raised buckwheat cakes. These were a bit thicker, a tad fluffier than her crepes, with a deeply nutty, earthy flavor that married perfectly with real maple syrup. In retrospect, she probably was not able to obtain buckwheat flour very easily, thus these were an occasional treat. Lucky for me buckwheat flour is easily found within a five minute drive at any number of my local grocers!

Mom’s buckwheat cakes began with a yeast starter prepared the night before, and her recipe used no flours but buckwheat. As a dedicated sourdough baker, I prepare a starter using my sourdough leaven and include a small amount of spelt flour to thicken the batter slightly. If you use sourdough on a regular basis for other baked goods, this is a great recipe to use up your leftover when feeding the starter. This is an incredibly simple and flexible recipe, which can also be prepared with yeast and is easily made gluten free. The pancakes freeze beautifully and make a very quick breakfast when thawed and heated.

In her later years, Mom lived in a retirement community. While she had meals available in the dining room, she missed her especially loved dishes; however, cooking had become a challenge for her. On one visit, she asked me if I could help her get a sourdough leaven started and then stealthily opened her small refrigerator and produced a bag of buckwheat flour. Sensing potential disaster growing in her fridge, I suggested that it might be best if I made and delivered the cakes to her, which I did for her remaining years. Yes, that’s just how addictive these buckwheat cakes can be…

While Mom served them with bacon, fresh blueberries, toasted pecans and maple syrup usually accompany mine. No matter what you choose to serve with them, these pancakes are a delicious start to the day!

Mom's Buckwheat Cakes

Prep Time30 minutes
Cook Time15 minutes
Total Time45 minutes
Course: Bread
Servings: 15 pancakes

Ingredients

  • The night before you want to make pancakes mix together:
  • ½ cup sourdough leaven
  • 1- cup buckwheat flour
  • ¼ cup spelt or whole-wheat flour
  • ¼ cup water
  • ¾ cup almond milk
  • Cover with saran and let sit at room temperature overnight. In the morning it will have risen and will be quite bubbly. To the starter add:
  • ½ teaspoon salt
  • 1 egg
  • 2 tablespoons oil I use coconut
  • 2 tablespoons honey
  • ½ teaspoon baking soda

Instructions

  • Allow to sit for about 5 minutes while the griddle heats to 350° F. Lightly grease, then scoop batter by scant ¼ cup full and pour onto the griddle. When the top appears to dry around the edges and bubbles appear, flip the pancakes and bake for about 30 seconds longer. Remove from griddle to serving plate.
  • Makes 12-15 pancakes
  • To make using yeast, substitute the following for the sourdough starter:
  • ½ tsp. bread machine/instant yeast
  • ½ cup warm water
  • ¾ cup milk
  • ½ cup spelt or whole-wheat flour
  • -cup buckwheat flour
  • The recipe can be made gluten free by following the yeast directions and substituting ½ cup all-purpose gluten free flour mix for the spelt or whole-wheat flour.
  • Proceed as above with the “in the morning” directions.


Provence Style Asparagus Soup

Provence Style Asparagus Soup

Seasonal…

Farm to table…

Funny how upscale restaurants use farm concepts to sell people on a nostalgic experience they have probably never known. Don’t get me wrong, I’m the first one in line when it’s announced that plans are afoot for a great restaurant dinner. The upscale chef probably has ideas for preparing that fresh produce that I will love, but would never think of, much less want to mess with.

Seasonal, farm to table food was what you ate on the farm from necessity; assuming you wished to eat on a given day meant that you would be eating what was ripe, whether you wanted it or not. But even if you didn’t, it would be the freshest I-don’t-want-that dish on your plate!

Lucky for me, when that dish was just picked asparagus, it was all good. Mom planted a huge asparagus bed, (undoubtedly with my dad’s labor) when they moved to the farm. She was a bit of an asparagus connoisseur, cutting the firm, thick stalks just slightly below ground level; only the stalks of perfect thickness. If they were too thin, you let them go to grow into the huge feathery plants that she said would feed the garden.

I no longer have the luxury of an asparagus bed outside the door, but I still love celebrating spring with the freshest asparagus I can find at the market. I have to laugh when I see some of the bundles of the thinnest stalks imaginable-these would have been my mother’s rejects. I stir-fry it just like she did, and also use it often for Thai inspired stir-fries and curries. There’s just one problem: I am always tossing out the woody lower stalks that break crisply off the stem. We didn’t have these on the farm, because we picked it at its peak. I’ve been throwing out these darn stalks for years, and suddenly that has begun to bother me…

Enter my Provencal Style Asparagus Vegetable Soup. I make a number of these easy soups, which are basically just vegetable purees, seasoned and thinned to the proper consistency. They are delicious hot, but when chilled, this one hits the spot on a hot summer day. And yes, perhaps peeling asparagus stalks is one of those upscale chef-fy practices, but this soup is totally worth it!

Provence Style Asparagus Soup

Prep Time15 minutes
Cook Time20 minutes
Total Time35 minutes
Course: Soup
Servings: 4 cups

Ingredients

  • 1 bunch lower asparagus stalks
  • 1 3- oz or so potato peeled and roughly chopped
  • ½ cup roughly chopped onion
  • ¾ cup roughly chopped fennel
  • 1 bay leaf
  • 1- teaspoon herbs de Provence
  • ½ teaspoon salt
  • ¼ teaspoon freshly ground pepper
  • 1 ½ cups broth I use chicken, but vegetable would work well too
  • 1- cup coconut milk lite or full fat

Instructions

  • Use a vegetable peeler to thinly peel the asparagus stalks. Trim off the bottom if woody. Combine these in a medium saucepan with the potato, onion, fennel, seasonings and broth. Bring to a boil, then reduce to a simmer and cook for 15-20 minutes, until the vegetables are tender. Cool slightly, remove the bay leaf, and then transfer to a blender. Blend to a smooth puree, then add and blend the coconut milk. Thin with additional broth if too thick. Taste for seasoning and correct if necessary. Serve warm or chill. Soup is nice when garnished with a scoop of sour cream or Greek yogurt and a sprinkle of herbs.


Hazelnut Cherry Granola

Hazelnut Cherry Granola

I wonder if you ever really know your parents?

My childhood self took living on a small family farm as the norm. Yet even then, it wasn’t. Having known my parents for decades, I have to wonder why I never asked them about their choice to buy and move to the farm. Two people couldn’t have been raised in more different circumstances; I would describe my mother as “cool jazz,” while my father was “a little bit country.” She had grown up in a comfortable urban home and attended a year of college, which she left to attempt a career in her beloved dancing. He had been raised poor on a family farm with many siblings, and at the first opportunity, exited the farm of his youth for city lights. It was the early fifties, and they were living the good life in a hip urban neighborhood when they flew the coop for life in the country. I suspect that my father’s memories of a farm childhood along with the birth of my older brother spurred the decision. While my mother would not strike one as the farm type, she truly bloomed where she was planted. She loved the farm and lived there for the majority of her life. Gardening, cooking, and preserving became her primary activities for a number of years while raising my brother and me.

When you think of farm meals, do you think of hearty, home-style comfort food? Well, there was a bit of that on occasion. But somehow my mother turned out to be a royal health food queen at the very moment that most people were discovering cake mix and biscuits in a tube. Two popular cookbooks of the time dominated our family’s diet, one from Carlton Fredericks and the other by Adele Davis. Somehow Mr. Fredericks parlayed an English degree into being a “nutrition consultant,” while Ms. Davis actually did have nutrition background, and is honored to this day. Both were into whole wheat, dried milk, wheat germ and low sugar, along with pushing vitamin and mineral supplements. Oh yes, we took our nasty horse pill vitamins on the farm! (Well, most of us-as I remember my dad escaped to work each day before the dosing occurred.) Both food writers also championed some questionable ideas as well, but my mother lived (and we ate) by their words.

I don’t even know how she obtained some of her ingredients, but I do remember trips to a local grain mill for stone ground whole-wheat flour. Yogurt had yet to hit the grocery aisles, so she made her own in a small warming oven adjacent to the baking oven. Our “popsicles” were home frozen from yogurt and juice concentrate. Most baked goods were the recipients of a whole-wheat makeover, and the rare item not baked from scratch got wheat germ plastered on the top.  I was a kid trying to fit in; living on a farm and eating “weird” food didn’t earn my support, but in the long haul my mama’s healthful approach to cooking was pretty influential. I probably shouldn’t mention that I gave up the vitamins the day I left for college though…

In honor of my mom’s and Adele’s approach to diet, I’m making granola this morning. Here in the desert southwest, the heat is ramping up and I am in need of hot weather whole grain breakfasts. While researching Adele Davis, I noted from the Adele Davis Foundation that she was the developer of granola as we know it today, that crisp mixture of oats, seeds, sweetener and nuts. Her recipe is on the foundation website should you wish to check it out. My mother would have embraced it for its use of soy flour and dried milk. Having eaten my share of soy flour and dried milk, I’m going with my own recipe! Simultaneously crisp and chewy, this granola is not too sweet, allowing the rich flavors of the nuts and fruit to shine. That said, if you like your granola on the sweeter side, you may wish to add brown sugar to taste along with the syrup mixture.

Hazelnut Cherry Granola

Prep Time15 minutes
Cook Time30 minutes
Total Time45 minutes
Course: Cereal
Servings: 16 servings

Ingredients

  • 3 cups whole old-fashioned oats
  • ½ cup golden flax meal
  • 1 cup coarsely chopped hazelnuts
  • ½ cup dried unsweetened coconut
  • ½ cup pumpkin seeds
  • 1/3- cup sorghum or maple syrup
  • 2 teaspoons vanilla extract
  • 1/3 –cup neutral vegetable oil I use avocado, but coconut would be delicious
  • 1 beaten egg white
  • ½ cup cacao nibs
  • ½ cup dried cherries

Instructions

  • Preheat the oven to 300° F. Spray a large sheet pan lightly with pan spray and set aside.
  • In a large bowl, combine the oats, flax meal, nuts, coconut and pumpkin seeds.
  • Combine the syrup, oil and extract in a small saucepan and warm over low heat. Stir this mixture into the oats thoroughly, making sure the grains are coated. Add the beaten egg white and again mix thoroughly. Turn the mixture onto the prepared sheet pan and spread into a thin layer. Bake, turning the mixture several for 30-45 minutes, until it is the brownness you like.
  • Allow for thorough cooling, as the granola will crisp as it cools. Then, gently break into clusters with a pancake turner, and stir in the cacao nibs and cherries.


*Gluten-free if made with certified gluten-free oats

Sweet Biscuit Shortcake


strawberry shortcake
Strawberry Shortcake

Okay. Y’know how you hate to admit that maybe, even quite possibly, you were wrong about something? Particularly to your parents? Even when you are considerably older and it shouldn’t matter?

So, perhaps I was incorrect as a child, when I whined incessantly about living on a small family farm. This is tough to admit, even though my parents have both ascended to the big farm in the sky. I can see them smirking all the way down on Earth as I concede this. Turns out, given today’s miniscule number of family farms, that I actually had a privileged childhood full of relative freedom and abandon. Roaming the fields with the family dog, pretending to prepare meals from the seeds and blooms of the orchard, riding my bike on relaxed country routes. And when I requested a sandbox, my dad simply had a large truck full of sand delivered, dumped into a huge pile in the back yard. What’s not to like?

Mostly, I had no peers near enough with which to play. My closest friend lived a mile away. So I had to make do with entertaining myself much of the time. There was also a great deal of work to be done, even on a small farm. My father planted a garden large enough to feed the county. While I loved dropping seeds into the beautifully plowed furrows in the spring, keeping the rows of plants weed free through the hot and humid summer was a never-ending task. And picking, podding, shucking, peeling-well, you get the idea. My dad worked in a large factory in the city, so he left us a daily list of such tasks, and there was no argument.

Ultimately though, the quality of the food I grew up eating spoiled me for life. There is nothing quite like sweet corn prepared within ten minutes of picking, freshly cut asparagus, new green beans simmered with bacon, just picked strawberries. And my mother was a great cook. I spent many days in the kitchen with her, preparing meals and preserving the bounty for winter’s feasting. In retrospect, life on the farm built the foundation on which I’ve lived my adult life, even though I haven’t lived on the farm now for many years. Having retired in the desert Southwest, I’m now exploring how to maintain those farm values, while prepping fresh meals in the Sonoran Desert. There’s much in common between those two experiences, as well as much to learn. Adapting to a completely different seasonal calendar of local food production is still a work in progress… However, it didn’t take me long to grab the locally grown strawberries that appeared at the farmer’s market in March.

My mother would have made these beauties using 100% all-purpose flour, one of her few indulgences, as you’ll see in future posts. She would butter the biscuit, drown it in fresh berries, and then pour whipping cream on top. My version updates her shortcake recipe with some spelt flour and is served with a yogurt whipped cream. I usually serve it for breakfast…never too early in the day for strawberry shortcake! No matter how you serve it, it’s spring on the farm, wherever you might be.

Sweet Biscuit Shortcake

Prep Time30 minutes
Cook Time20 minutes
Total Time50 minutes
Course: Quick Bread
Servings: 6 to 8 cakes

Ingredients

  • 1 cup whole grain spelt flour
  • 1 cup all-purpose flour
  • 3 tsp baking powder
  • ¾ tsp. salt
  • 3 Tbsp. sugar
  • ½ cup cold butter
  • 1 egg beaten
  • about 1/3 cup milk

Instructions

  • Pre-heat the oven to 425° F. Coat a baking sheet or layer pan with non-stick baking spray, and set aside.
  • Place flours, salt and sugar in work bowl of food processor. Pulse briefly to mix. Add the butter, cut into small bits. Pulse the mixture until the butter is evenly distributed, and about the size of small peas. Alternately, the dry ingredients can be mixed in a bowl and the butter cut in with a pastry blender. Add the milk gradually, stirring gently to make soft dough; if additional is needed, add by the tablespoon until the consistency is right. Turn out onto a lightly floured surface and pat into a ½-inch thick circle. Cut into rounds of desired size (Mom’s were always substantial…) Bake in preheated oven for 15-20 minutes until golden.
  • Top with sliced strawberries or other fruit of choice. Whip together 1/3 cup plain Greek yogurt, 2 tablespoons of heavy cream and ½ teaspoon of vanilla to top the shortcakes.